
Warnings: Grinders are dangerous. Please do not place in any area that could be accessed by a child or other people who may want to put their hands into the burrs. We don't know who would do that, but I'm sure it has happened before and will happen again.
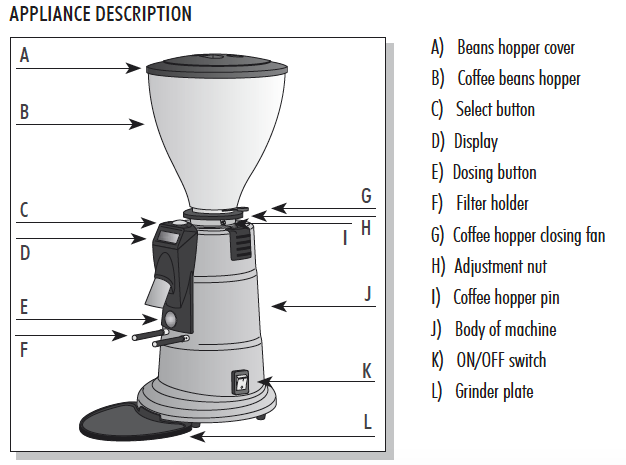
APPLIANCE DESCRIPTION
TECHNICAL DATA (M7D and M4D)
| M4D | M7D | |
| Grinding Blades | 58 mm Flat | 68 mm Conical |
| Power | 250W | 800W |
| Motor | 1400 RPM | 350 RPM |
| Dosing Counter | Yes | Yes |
| Dimensions (mm) | 190 x 210 x 430 h | 250 x 360 x 635 h |
| Net Weight | 8.5 kg | 16 kg |
| Coffee Hopper Capacity | .5 kg | 1.4 kg |
OPERATING MENU (M7D and M4D)
Only some of these items will be visible depending on the settings of the programming menu. Press the select button to scroll through the menu.
| Display | Function |
 |
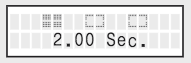
Dose Number 1 (Four Black Boxes on the left) |
 |
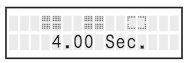
Dose Number 2 (Four Black Boxes on both sides |
 |
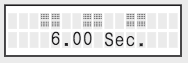
Continuous Dose (Gradually increasing bars) |
 |
Dose Number 1 (With 3 Dose Mode enabled) |
 |
Dose Number 2 (With 3 Dose Mode enabled) |
 |
Dose Number 3 (With 3 Dose Mode enabled) |
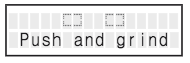 |
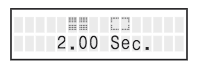
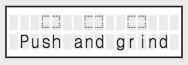
Push and grind Dose 1 & 2 (Press the dosing button once to start dispensing Dose 1. Push twice for Dose 2. The activation time for Dose 2 is 2 seconds.) |
 |
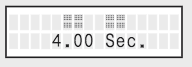
Push and grind Dose 1, 2 & 3 (Press the dosing button once to start dispensing Dose 1, twice for 2 and 3 times for 3. The activation time for Dose 2-3 is 2 seconds.) |
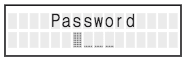 |
Password requested (Turn the select button to set the first number, and then press it to move on to the next.) |
 |
Incorrect password error |
PROGRAMMING MENU (M7D and M4D)
To enter the programming menu for the M7D and M4D, press the select button for 10 sec. To scroll through the programming menu, turn the select button, then press it to enter and change the parameters. To change the parameters, turn the select button, then press it to confirm the data and return to the programming menu.
| Display | Function |
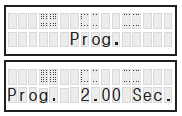 |
Programming Dose No.1 The timer advances to +/- 0.05 sec. |
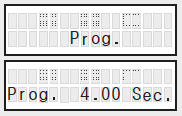 |
Programming Dose No.2 The timer advances to +/- 0.05 sec. |
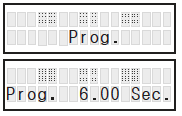 |
Programming Dose No.3 The timer advances to +/- 0.05 sec. Dose No.3 can be disabled by turning the select button anti-clockwise. The timer will display the wording OFF. |
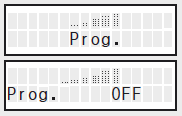 |
Continuous Dose Programming The Continuous Dose can be enabled (ON) or disabled (OFF) |
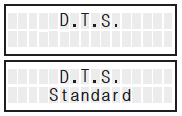 |
Selecting the type of dosing Standard: select the type of dose using the select button. Push and Grind: select using the dosing button. |
 |
Dose counter (P: partial T: total) The partial dose counter can be reset by holding down the select button for 10 sec. To return to the programming menu, turn the select button clockwise. When you get to the wording EXIT, press it. |
 |
Password The Password prevents access to the programming menu. To set the Password, see chapter 9-5. Save: saves the Password Exit: exits without saving |
 |
Data The software allows a date to be stored, which can be changed. To set the date see chapter 9-6. Save: saves the date Exit: exits without saving |
 |
Software version |
 |
EXIT Press the select button to exit the programming menu. |
SAFETY INFORMATION
- This appliance has been designed exclusively for grinding coffee beans, consequently the manufacturer will not be held liable for any damage or incidents that are caused if it is used for any other purpose.
- The warranty will be automatically invalidated in the event the appliance is used improperly. Only qualified operators must install the appliance or carry out any technical maintenance work.
- The appliance is not waterproof and must be kept well clear of any potential water sprays or very damp areas.
- The appliance has been designed for professional and not home use, and therefore must only be used by trained personnel. The appliance must not be used by children, or by adults with reduced physical, mental or motor capacities, nor by anyone without sufficient experience or knowledge, unless they receive specific training or use the appliance under the supervision of a trained person.
- Keep the appliance out of the reach of children.
- Children being supervised not to play with the appliance.
- The appliance has a thermal circuit breaker for the motor, when it triggers and stops the grinder, unplug the appliance at the mains and wait at least one hour before turning it back on again.
- If the power cable is damaged it must be replaced by the manufacturer or by the technical assistance service, or at any rate by a person with similar qualifications, so as to prevent all risks.
- UNPLUG THE APPLIANCE BEFORE CARRYING OUT ANY MAINTENANCE OR CLEANING WORK.
INSTALLATION AND ELECTRICAL CONNECTIONS
Place the appliance on a flat surface to ensure it is perfectly stable. Before connecting the appliance to the mains:
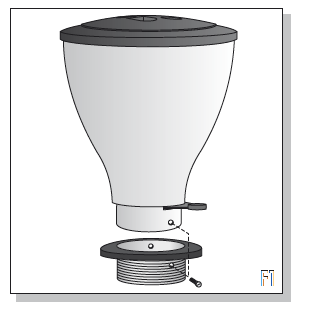
- Align the hole of the hopper with one of the holes of the adjusting ring-nut (see figure F1). Check that the fan does not prevent lowering the adjustment disc stopper pin, otherwise change the hole.
- Fasten, using the appropriate screw. - make sure the switch is off (position 0) and that the voltage and frequency data given on the data plate are commensurate with that of the mains supply.
APPLIANCE FUNCTIONS
Once the coffee hopper is placed firmly on the upper grinding blades holder, pour in the coffee beans.
Put the lid on the coffee hopper and open the fan, to allow the coffee beans to flow into the grinder.
Do not turn the appliance on without the coffee hopper or without its lid.
To start the appliance, press the main switch (position 1). At night or when operators are absent, turn off the switch.
- In Standard mode, press the select button to scroll through the menu. When the required dose is displayed, press the dosing button to start the grinding process.
- In Push and Grind mode, selection and grinding are directly controlled with the dosing button. Press it once for Dose No.1, twice for Dose No.2 and three times for Dose No.3, if enabled.
- In addition, the appliance has a Continuous Dose function that allows grinding of the required amount of coffee without setting the time by simply pressing the dosing button.To interrupt the grinding of any timed dose, press the select button.
INITIAL START-UP
- When you start up the appliance, a short welcome message appears on the display.
- After a few seconds, one of the pre-set functions appears.
- To switch from one function to another, press the select button positioned above the display (blue).
- To adjust grain coarseness, use the continuous dose and precision scales to weigh the exact amount in grams. Each time you adjust the grinding (see Grinding Adjustment below), remember not to count the first two double doses because they might contain part of the ground coffee from the previous adjustment operation.
- Once the coffee is pressed and you have checked the required extraction time, proceed with adjusting the programmed doses. (See Programmed Doses).
- Please note that every time you adjust the grinding process, it will be necessary to check that the amount of ground coffee is as required.
- For the M7D version, fitted with conical burrs, a test run with at least 1kg of coffee for grinding is necessary before proceeding with final adjustments.
GRINDING ADJUSTMENT
Micrometric regulation
Turn the horizontal regulation knobs to change the coarseness of the ground coffee. Micrometric regulation does not require blocking. Regulate the grinder with the motor turned on if there is any coffee in the grinder, with it turned off if it is empty (see figure F3). “+” shows the rotation direction to increase the coarseness of the ground coffee. “- “ to decrease the coarseness of the ground coffee. We recommend grinding and using a few grams of coffee each time you change the coarseness, which will help remove the small amount of ground coffee already inside the grinder. If the coffee flow is too slow it means that the ground coffee is too fine, while if the flow is too fast it means the ground coffee is too course.
Many other factors can also affect the coffee flow, such as the amount of coffee, how much it has been pressed, the appliance adjustment, the cleanliness of the filters and the climatic conditions.
PROGRAMMING THE M7D AND M4D
- Switch on the appliance to enter the programming menu.
- After the welcome message, press the select button (10 seconds or until the wording on the display changes).
- Scroll through the menu by turning the select button. When the function to be changed is displayed, press it to enter and change the parameters.
- To exit the programming menu, turn the select button, and when the wording “EXIT” appears on the display, press it to confirm and return to the operating menu.
PROGRAMMED DOSES
- To enter the programming menu, turn on the appliance. After the welcome message appears, press the select button (10 seconds or until the wording on the display changes).
- The appliance has digital dose adjustment.
- Scroll through the programming menu by turning the select button. When the dose to be adjusted is displayed, press it to start programming.
- Turn the select button to adjust the time shown on the display. The time will increase when it is turned clockwise and decrease when it is turned anti-clockwise.
- When the required time has been set, press the select button to confirm the value and return to the programming menu. Proceed with adjusting the next dose.
- The software is equipped with three programmable doses. Dose No.3 can be disabled (OFF) by turning the select button anti-clockwise.
CONTINUOUS DOSE
To enable or disable the continuous dose, proceed as follows: scroll through the programming menu by turning the select button. When the Dose symbol is displayed, continue pressing it to enter.
- Turn the select button to enable or disable the function. Then press it to confirm and return to the programming menu. From the operating menu you can now choose the continuous dose, if enabled.
- The appliance can only operate in the continuous dose mode for short periods. Never exceed the time of one minute continuously in order to prevent the motor from overheating.
D.T.S. (DOSING TYPE SELECTION)
The D.T.S. function allows you to decide how to select the dose.
- In Standard mode, selection takes place by using the select button to scroll through the functions set in the operating menu. - In the Push and Grind mode, selection takes place directly using the dosing button.
- Press the appliance once to start dose No.1, twice for dose No.2 and three times for No.3, if enabled.
- The maximum selection time is 2 sec.
- To select the continuous dose, if enabled, press the select button.
- To set the D.T.S., scroll through the programming menu by turning the select button. When the wording “D.T.S.” appears on the display, press to enter.
- Turn the select button to switch from one function to another, and then press it to confirm and return to the programming menu.
DOSE COUNTER (NO. 12345)
The appliance is equipped with a function to control the number of doses for timed functions.
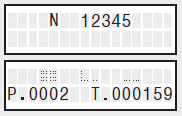
Scroll through the programming menu by turning the select button. When the wording “N° 12345” appears on the display, press it to enter the display. The letter “P” indicates the partial dose, whereas “T” indicates the total dose.
Turn the select button to switch from one dose counter function to another (Dose No.1, Dose No.2 and Dose No.3).
The partial dose counters can also be reset by holding down the control disc for 10 sec. or until the value “0” appears on the display. Select “Exit” to leave the Dose Counter function and return to the programming menu.
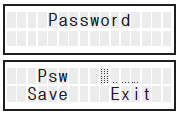
PASSWORD
The Password is a function that prevents access to unauthorised personnel.
- Scroll through the programming menu by turning the select button.
- When the wording “Password” appears on the display, press it to enter.
- The cursor will flash above the first digit to be entered. Press the select button to start setting the password.
- After each digit has been set by turning the select button, press it to move on to the next digit.
- Once the fourth digit has been set, the wording “Save” will flash.
- Confirm “Save” to save the password and exit, or turn to “Exit” to exit without saving and return to the programming menu.
- If you select “Save” without having set the four digits, the function will close without saving.
- The password can be renewed by setting “----” and then saving as confirmation.
- When a Password is set, it will be requested at every attempt to access the programming menu.
- If the wrong Password is inserted, the wording “ERROR!” will appear on the display.
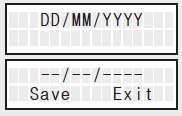
DATA
The programming menu can store a date that can be changed.
- Scroll through the programming menu by turning the select button. When the wording “DD/MM/YYYY” appears, press it to enter.
- The cursor will flash above the first digit to be entered. Press the select button to start setting the date.
- After each digit has been set by turning the select button, press it to move on to the next digit.
- Once the date has been set, the wording “Save” will flash.
- Confirm “Save” in order to save the date and exit or turn to “Exit” to exit without saving and return to the programming menu.
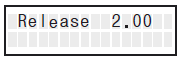
RELEASE
The programming menu can also display the software version used by the coffee grinder. This information can be obtained from the technical service centre in the event of operating faults.
MAINTENANCE
Contact Clive if your machine needs maintenance. We are happy to help. support@clivecoffee.com
CLEANING
ALWAYS UNPLUG THE APPLIANCE FROM THE MAIN SWITCH BEFORE CLEANING.
DO NOT PLACE THE APPLIANCE IN WATER. DO NOT USE ANY ABRASIVE PRODUCTS AS THEY COULD DAMAGE THE SURFACE OF THE GLOSSY PARTS ON THE APPLIANCE.
Removable plastic parts
Detach all removable parts from the appliance (lid, coffee beans hopper, drip tray, etc.) and wash them in water and mild detergent (never clean them in a dishwasher).
Appliance body
Clean the appliance body with a damp cloth, paying attention to any parts that should not be exposed to water, like the on-off switch (H).
Comments
0 comments
Please sign in to leave a comment.